As my deadline is tomorrow, this may be the last post that I put up here. I have now put together an Industry Exercises movie to demonstrate my contribution to the third year film, Snatched. Today, I also received the fully rendered and textured shot, ready for the final cut of the film; so I am glad to say that it will be included in this movie and in the latest update of my showreel.
This Industry Exercises movie had to be at least 30 seconds long, so to pad it out, I decided to include a few playblasts which showed the stages from initial blockout, right through to the smoothening out of the poses and the application of the camera movements and gravity. The playblasts that illustrated each stage of the piece are then followed by the final rendered shot.
This means that the viewer will be able to see how I constructed the shot and how I experimented with the weight of the characters as they moved through the air; along with how I interpreted the animatic that the third years gave me to work with.
Another thing that we were told to place on the DVD for our Industry Exercises was this sequence which consisted of the EBU HD Colour Bars, followed by a countdown clock and then 10 seconds of blank screen, until the short movie started; as demonstrated below.
This is because this piece had to comply to broadcast standards as much as possible. At first I was baffled by this because I could not work out the timing for everything at first. I was also unsure what I had to put next to the clock, as I knew I had to list some basic information about the programme. However, after having a few look at the Ravensbourne Technical Standards and asking my tutors, I soon worked it out.
Next to the countdown clock, I had to list the Programme Name, the Programme Producer (me!), whether the video is HD or SD, whether the sound is stereo or mono, the dimensions of the screen and the duration. I quite enjoyed this practice, as I have always been fascinated by how programmes are set up in preparation for broadcast, as well as how a television channel is organised.
Here is my final movie for the Industry Exercises unit, complete with the test card and clock;
If you would prefer not to sit through 30 seconds of colour bars and a monotonous tone, here is a link the Industry Exercises movie itself on Youtube.
Thursday, 16 June 2011
Tuesday, 14 June 2011
Unfortunately...
When I tried to burn a DVD on my MacBook Pro, which had one of my label designs stuck onto it, my DVD drive started doing the most disconcerting thing. It started making a crackling effect and when I pressed the eject button, the DVD would not come out at first. I had to hold on to the eject button for ages before the DVD would come out.
The same thing happened when I tried the DVD on the built in DVD player on my TV at home. Both of these DVD drives consisted on a slot to slide the DVD into, which leads me to believe that a labelled DVD can only work properly in DVD drives that have a tray which comes out and not DVD drives with slots.
This means that I am going to have to make do with distributing my showreel on DVDs without my personalised label.
DVD Cover design
In this post, I shall be leaving the realm of Animation and entering the realm of Product Design; something that I haven't done properly since I was about 16 but I still remember a few things.
When designing my DVD cover, I decided that I wanted something that could be made cheaply and easily, so that I could distribute my showreel around with ease. Initially, I wanted to do a 4-panel DVD wallet, also known as a lancing pack, as demonstrated in the image below
 I also made a template for my DVD wallet in Photoshop, which looked like this. Click to enlarge
 However, there were quite a few problems with producing this design. First of all, I did not have a printer or paper large enough to print this whole template; therefore I considered outsourcing the production of the piece to a company that specialises in DVD/CD packaging.
I had a look at many different services online, such as this one called webs4cd. However, this service, much like others required you to order a minimum of around 250-300 wallets and this would cost around £474 including VAT. This would be alright if I was intending to make a profit from these DVDs, but for a student project or a showreel DVD that is intended to be distributed freely, I could not really justify paying that much for so many wallets.
Therefore, I had to look at other means of producing my DVD wallet. After doing a bit of searching, I came across a business based on ebay called SRN that sell various DVD and CD packaging products as well as printable photo paper. I came across this product which consisted of 50 sheets of A4 CD/DVD printable wallets which costed only £3 and free postage.
The only thing about the paper was that it was 2 panel wallets and therefore I needed to compromise the look of my design. I then redesigned it and came up with this:
 Now the next thing to do was print this design out on a template and stick it together. I printed it out and here is the outcome.

When designing my DVD cover, I decided that I wanted something that could be made cheaply and easily, so that I could distribute my showreel around with ease. Initially, I wanted to do a 4-panel DVD wallet, also known as a lancing pack, as demonstrated in the image below

I had a look at many different services online, such as this one called webs4cd. However, this service, much like others required you to order a minimum of around 250-300 wallets and this would cost around £474 including VAT. This would be alright if I was intending to make a profit from these DVDs, but for a student project or a showreel DVD that is intended to be distributed freely, I could not really justify paying that much for so many wallets.
Therefore, I had to look at other means of producing my DVD wallet. After doing a bit of searching, I came across a business based on ebay called SRN that sell various DVD and CD packaging products as well as printable photo paper. I came across this product which consisted of 50 sheets of A4 CD/DVD printable wallets which costed only £3 and free postage.
The only thing about the paper was that it was 2 panel wallets and therefore I needed to compromise the look of my design. I then redesigned it and came up with this:


Monday, 13 June 2011
Tuesday, 7 June 2011
DVD Label Making
In this post, I am going to talk about the printing the label that will be place directly on my DVD. I want my showreel packaging to look just as professional as the DVD menu and indeed, the showreel itself. This meant that I will need the look of the DVD and it's cover to reflect my professional image.
To make my DVD label, I ordered the Avery CD Kit With Applicator, Software Disc and Labels.
 This came with sheets of A4 printable CD labels and CD covers, an applicator for applying the labels on the CD or DVD and software for designing the label.
I started by installing and running the software, so I could design the label that I would place on my DVDs.
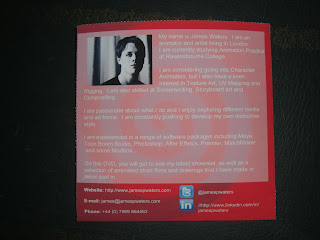
 As with everything that I use to promote my professional image, I decided to include the Kash Kong Monkey against the swirling red backdrop on my DVD label. I simply uploaded this image into the template and scaled it so that the image fitted on the label in a way that I liked. I then used the text tool to put the name, "James Waters: Showreel" on the label, as well as various contact details.
When I was satisfied with it, I then printed it onto DVD label paper, which was A4 paper which the labels were stuck to. Here is how the DVD label looks printed out.
 Now, the next thing to do is to peel this label off and apply it to a DVD using the applicator. This is done by placing the label on the applicator face down as illustrated below.


To make my DVD label, I ordered the Avery CD Kit With Applicator, Software Disc and Labels.

I started by installing and running the software, so I could design the label that I would place on my DVDs.

When I was satisfied with it, I then printed it onto DVD label paper, which was A4 paper which the labels were stuck to. Here is how the DVD label looks printed out.


Next, I place the CD on top, again face down. I also place a sheet of plastic over the CD to protect it when I press down.

Lastly, I place my hand on top of the button in the centre and I press down on the applicator, flattening the whole device and fusing the label to the DVD.


And now here is how the finished DVD looks, all that is left to do now is to burn the showreel and menu to the DVD and then to make the packaging for it. The packaging will need to be something simple, that can be made quickly and cheaply, as I will need to make many of these to distribute my showreel to whoever requires it.

Falling with style :)
Yesterday, I went into uni to meet with the third years and work on my shot, while receiving their feedback. I found that I prefer working on the sequence with them as opposed to working on it on my own, at home. They told me that I did a good job but there were a few things that needed improvement. First of all, the spinning at the beginning needed to be slowed down and also at the first time he attempts to grab the chicken, I needed to exaggerate the lean and grab.
I slowed down the first spin simply by making the starting point of the spin closer to the end point, resulting in a shorter degree of turn. I exaggerated the grab by key framing his hips so they move up with his arm movements and also bending the arm more at the points when he grabs, creating more follow through. Here was the first out come.
After reviewing this piece of animation, the third years had decided on more changes to be made. They decided that the first grab wasn't really working, as there it is far too stiff and weighty to happen in mid air. Therefore they decided to cut it out and have it so the marmot climbs up his arm as soon as they swing around. I did this simply by deleting the keyframes between when he begins grabbing and until the marmot changes facial expression and then moving the remaining keyframes back.
The second part that they wanted changed was the animation in between when the marmot bounces on the mongol's head and catches the chicken. They wanted the movement to be much slower than it was. I did this by moving the keyframes of both the marmot and the mongol apart. This was very difficult as there were keyframes for the locators, and arm controls at different positions meaning I had to spend a lot of time deleting frames and moving frames into position to make it even again.
They also asked me to make the mongol's second grab for the chicken more subtle, so that the movement was concentrated in the hands rather than the arms. Finally they asked me to make the movement of the chicken leg more wobbly, as the way I had it before was quite static. I now had to shorten the camera movement so that it moves faster, but it still stops at the point when it is supposed to stop, which is when the two characters discover they were falling.
Here is how the falling sequence looks now; shorter and quicker than before.
The third years believe that this sequence looks much better, although one member of the team is not keen on the spinning movement as the marmot catches the chicken. The movement in this looks more natural for characters that are falling. I have sent this file to the third years to be textured and rendered; I am hoping to receive the fully rendered animation so I can include it in my showreel.
Sunday, 5 June 2011
DVD Menu Creation
For the showreel DVD, I wanted to create an interactive menu, that was personalised to include my own design. The ideal piece of software that I would have liked to use was DVD Studio Pro, because it is great for creating menus with motion graphics and other stuff, but unfortunately it was out of my price range and I couldn't find a crack for it.
Instead, I settled for iDVD, the DVD making software that came with my MacBook. At first, I disliked it because it didn't seem as flexible as DVD Studio Pro but after a bit of playing around, I figured out how to customise a pre-made theme so that it has my design. This was important, as I wanted the DVD to present my strong visual image or "brand" if you like, even though I hate that word.
This is a screenshot of the Main Menu of my showreel DVD as it looks now, with the Kash Kong Monkey background that I also use on my website. Click to enlarge.

This menu consists of three options; Play Showreel, Artwork and Website. The default highlighted button is Play Showreel as the showreel is the first thing that anyone who is observing this DVD will want to see, particularly employees. I was hoping to make the monkey image into a button which would take the user to my showreel, but iDVD was only capable of creating buttons out of text or basic shapes. On either side of the Play Showreel, I have put up two other buttons; one just leads to an address for my web site and looks like this.

The other button, labelled Artwork leads to two sub menus called Animation and 'Gallery respectively.


In the Animation sub menu, the user can look at a selection of complete animated work that I have done over the past few years. The Gallery sub menu gives the viewer a choice between two slide shows; one of a selection of my life drawing work and another of my Sketches; which includes Concept Art and personal work.
This means that although the Showreel will be the centrepiece of this DVD and the only part that most potential employers will have the chance to look at, I have provided the user with a website and some work in greater detail, in case they are interested in my work.
Subscribe to:
Posts (Atom)